In an earlier post, I showed how it is possible to permanently position a legend in the QGIS Cloud map as part of a QGIS Cloud Pro subscription. To achieve this, the appearance of the map view was changed using CSS. In this post, I will describe exactly what this is and how it works.
The appearance of the QGIS Cloud Web Client is controlled via CSS. CSS stands for Cascading Style Sheets. It is a design and formatting language that is used to determine the appearance of HTML documents. It is therefore about design or style, not the content of a website. With CSS, users can, for example, define fonts, colors, lines, heights and widths on a website. The elements in the appearance of the QGIS Cloud Web Client are controlled via CSS. These CSS elements can be overridden by the user in a viewer, which is part of a QGIS Cloud Pro subscription. In this way, the appearance of the QGIS Cloud Web Client can be customized.
We are aware that we are already moving deep into the area of web design with this topic. We cannot write a tutorial on the use of CSS here either. There are already some good tutorials on the Internet. However, we can show you how you can basically change the CSS of the QGIS Cloud Web Client.
Here in our example, we start with an empty map so that we can concentrate entirely on the question of CSS. We don’t want to design the map, but the appearance of our personal QGIS Coud Web Client. We don’t need any map content for this. But we do need a project. Therefore, create an empty QGIS project that you then publish on QGIS Cloud. We call the project css. In the next step we need to define a viewer and connect it to the map css as described here in the QGIS Cloud Documentation. Let’s call the viewer MyCSS. Now we are ready to start our CSS design.
Finding CSS ID and class information
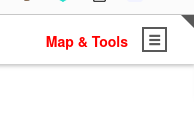
As a first change in the QGIS Cloud Web Client we want to change the color of the text of the app menu button from black to red. The text Map & Tool should therefore appear in red. But how do I start? At the beginning we are probably a little lost by the whole topic. Where do I find what, and how should I even get started? Since there are many browsers that are supported by the QGIS Cloud Web Client, but we cannot cover all of them here, we will limit ourselves to the Firefox browser. Firefox has developer tools that are very helpful when working with CSS. Other browsers also have such tools, which generally work in a very similar way.
In Firefox, the developer tools are activated with the F12 key. After pressing the F12 key, Firefox looks like this:
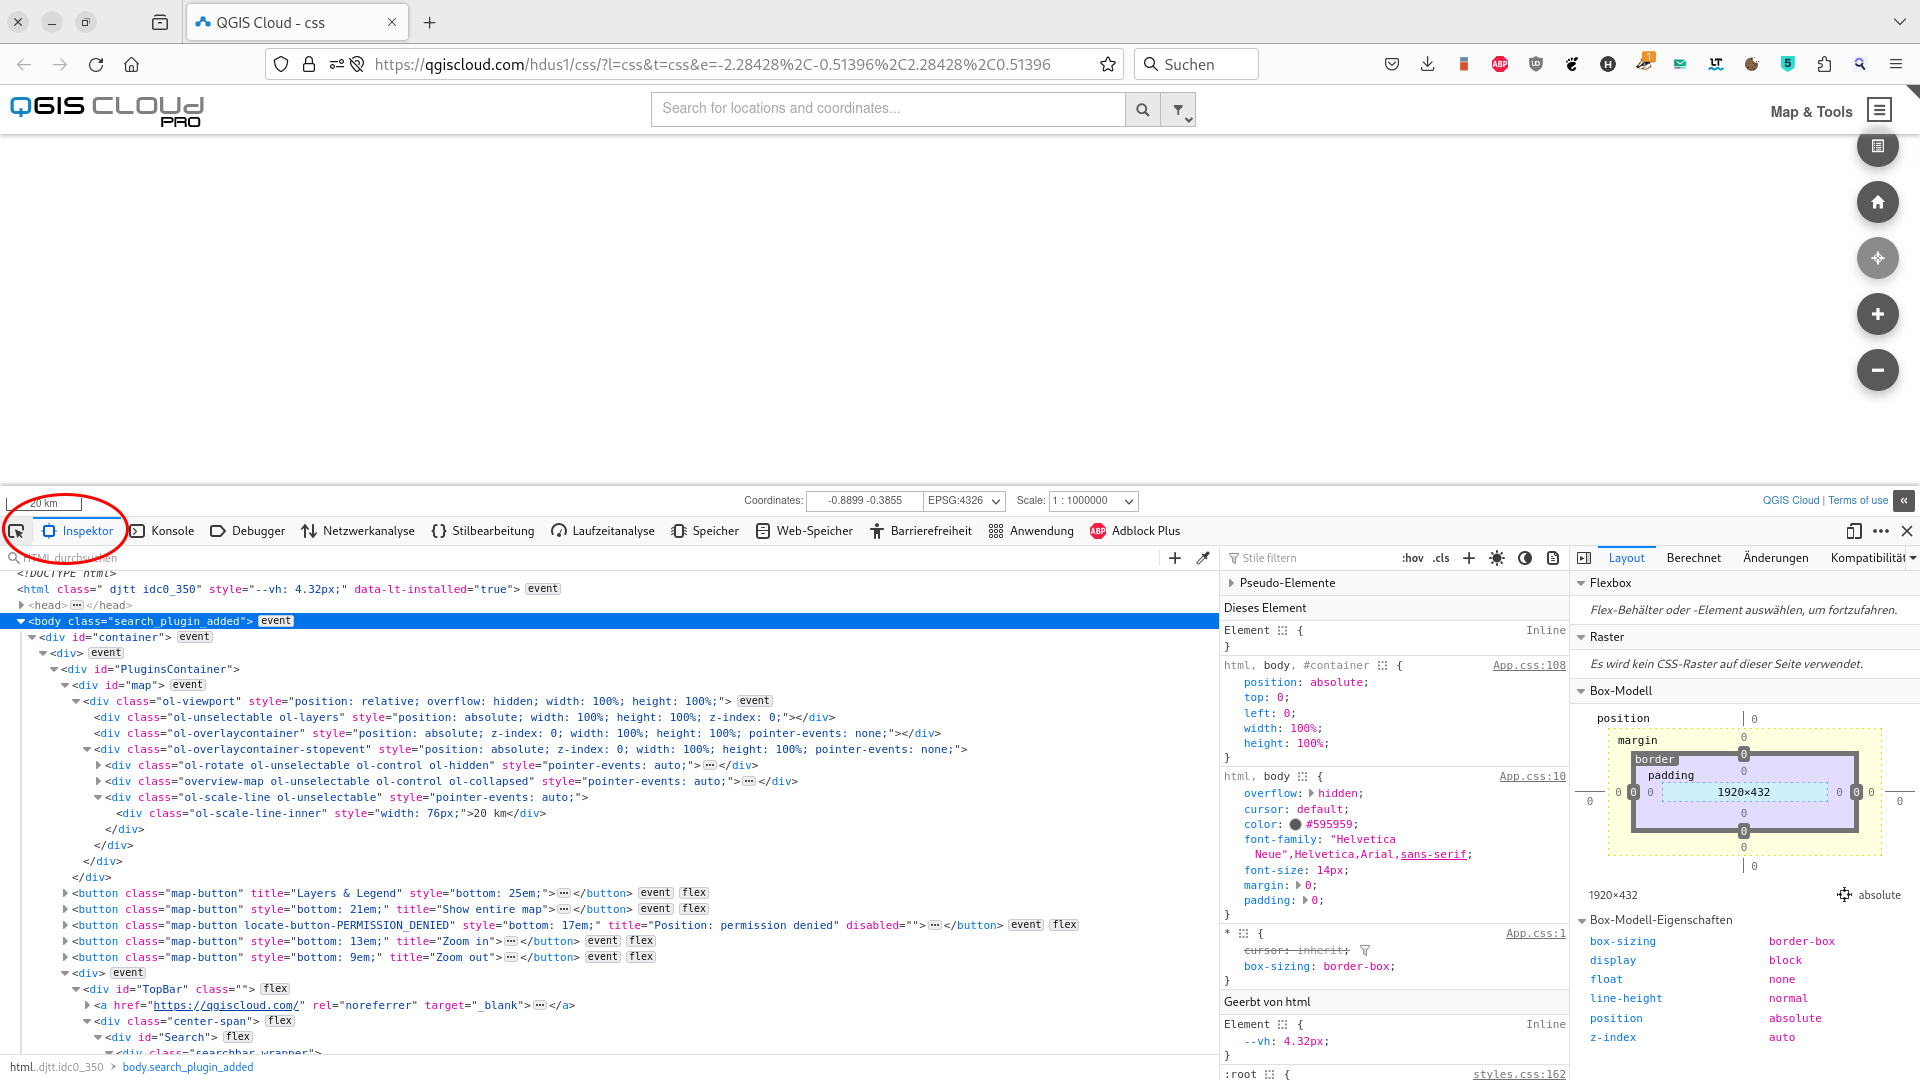
For our question we need the inspector at the top left of the developer tools.
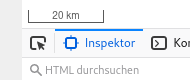
Once we have activated it, we need to activate the selection tool.

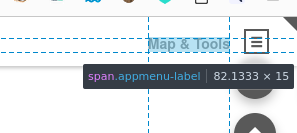
Now we have the possibility to identify the individual elements of the page by moving the mouse pointer over the elements of the page. Whenever an element is active, the CSS information of the element is displayed. Hover over the app menu with the mouse and click on it with the left mouse button
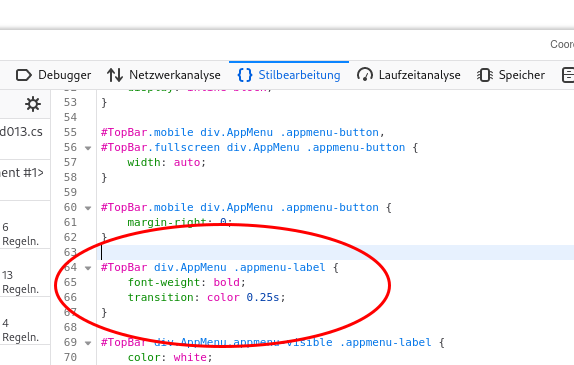
After clicking on the selected element, the cursor of the CSS inspector jumps to the exact position in the CSS where the definition of the clicked element is located.
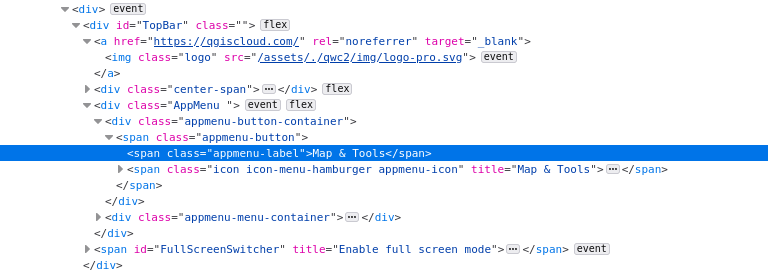
Now click on the line . This is exactly the line that leads us to the CSS definition of the appmenu label, whose color we want to change to red. The corresponding CSS definition for the label is now displayed in the inspector. This definition is the one we are looking for. We also learn that the CSS for the label is defined in the file TopBar.css from line 64.
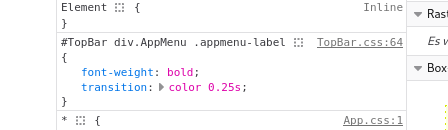
You can also click on the link TopBar.css. Then the CSS file opens directly and you can copy/paste the definition directly from this file.
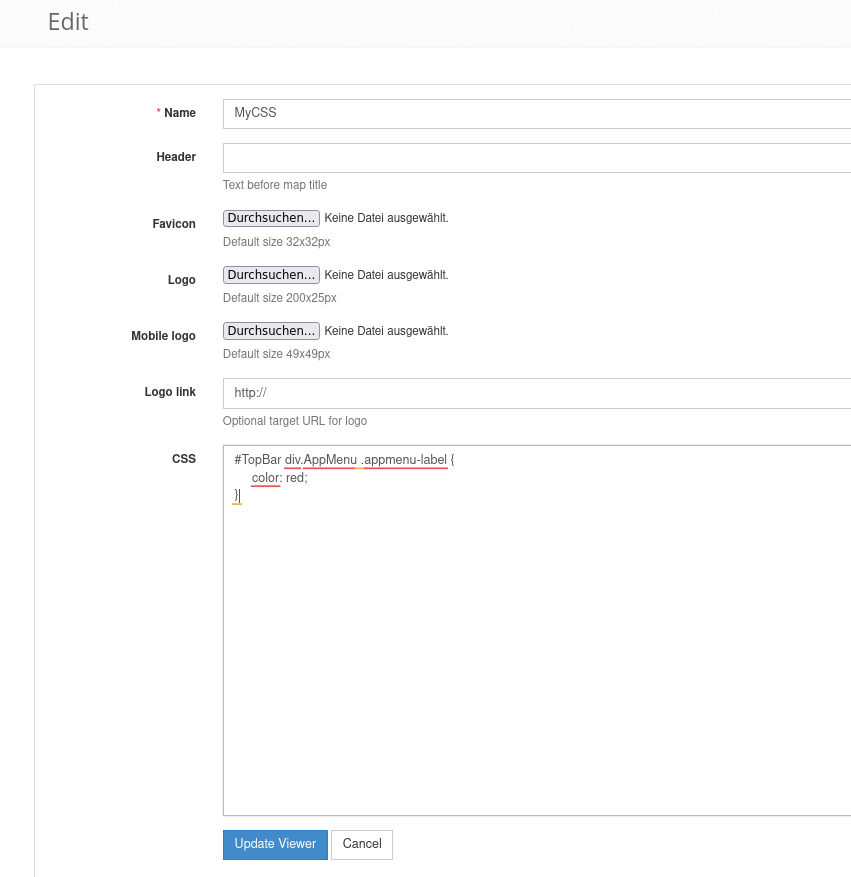
This is the entire CSS definition of the appmenu label. But how can I change the color? We can do this by color definition into our viewer and extending it accordingly. To do this, open the page on qgiscloud.com for the definition of our newly created viewer MyCSS and paste the copied CSS lines into the text field CSS. If you no longer know how, you can look here. However, this does not change the appearance of the QGIS Cloud Web Client. To make the text appear red, we still need to define the text color. We achieve this by inserting the line color: red; into the definition. As you can see, you do not have to insert the entire CSS definition again, it is sufficient if you only add your extension.
   #TopBar div.AppMenu .appmenu-label {
     color: red;
   }
Now you need to refresh the viewer and reload the map. You should then see the App Menu label in red.
Feel free to experiment with different colors, styles and decorations. Just remember to update your viewer before you reload the page.
CSS more in detail
In the next steps, we want to customize a few components of the QGIS Cloud Web Client. First, we want to change the background color of the menu bar at the top. To do this, we first need to find out which CSS ID is responsible for this. The procedure is the same as described in the previous chapter. Press F12 to open the Developer Tools again and activate the Inspector and move the mouse over the header bar so that it looks like in the illustration.
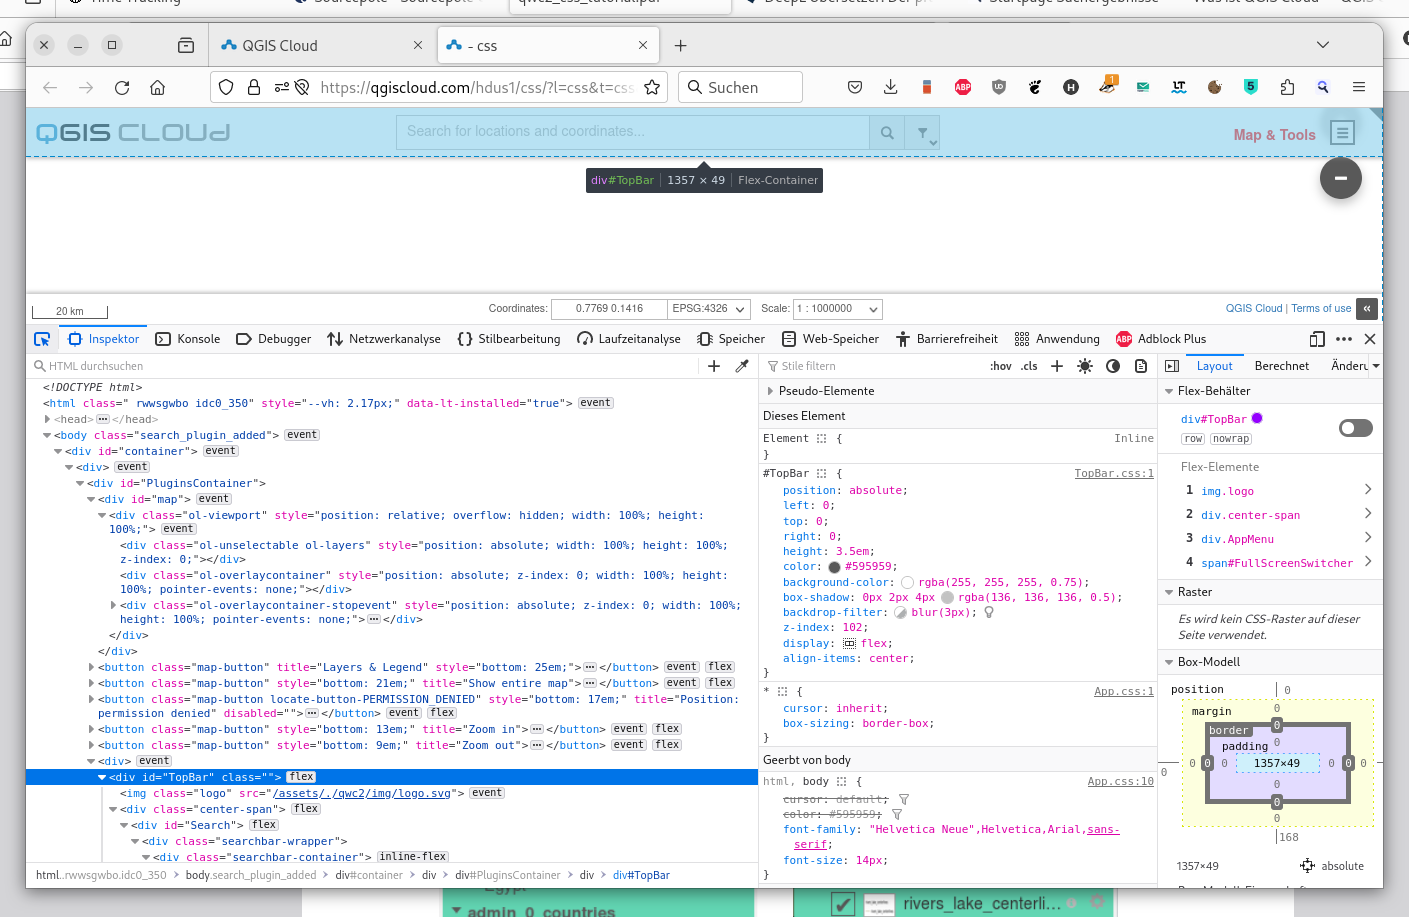
You can now see in the Inspector window that the ID of the element is TopBar, highlighted in blue. Great, now we can change the color by extending the CSS definition for the #TopBar ID with:
   #TopBar div.AppMenu .appmenu-label {
     color: red;
   }

   #TopBar {
     background-color: #c1ccc7;
   }
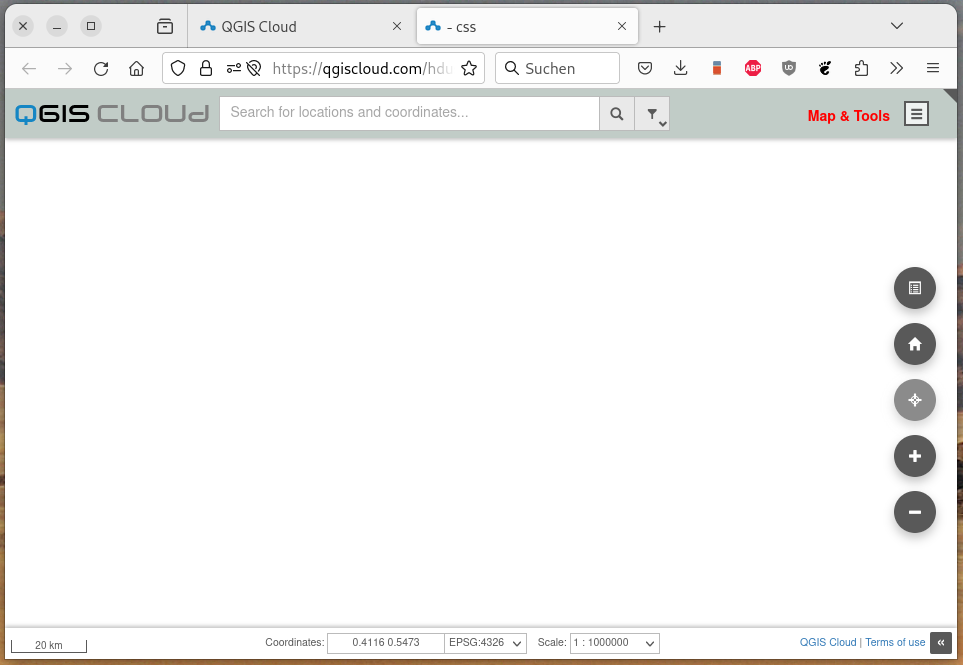
Don’t forget to refresh the viewer and reload the page with the QGIS Cloud Web Client. If you have done everything correctly, the TopBar element should now look like this.
We can also change the popup menu for the layer overview. Use the Inspector to find out what the ID of the element is. Then you can start.
   #LayerTree div.layertree-tree {
     background-color: #62d6b3;
   }
And this is what it looks like when everything has been done correctly.

If we now add a few more design elements, the viewer can be used to design a QGIS Cloud Web Client, which then has a somewhat greener appearance.
   /* Top bar and bottom bar, background color set to #c1ccc7. */
   #TopBar, #BottomBar {
     background-color: #c1ccc7;
   }

   /* The lines of the burger menu in blue */
   #TopBar div.AppMenu .appmenu-icon {
     color: #3800ff;;
   }

   /* The font color of the map buttons in #595959 and the background of the buttons in #c1ccc7 */
   button.map-button {
     color: #595959;
     background-color: #c1ccc7;
   }

   /* Background color of the layer tree in #eeebeb */
   #LayerTree div.layertree-tree {
     background-color: #eeebeb;
   }

   /* Active search element type in #62d6b3 */
   #Search li.searchbar-provider-selection-active {
     background-color: #62d6b3;
   }
As you can see, it is quite easy to customize the appearance of the QGIS Cloud Web Client with the appropriate tools such as the Developer Tools. Another example of the design with CSS can be found in the here.