With QGIS Cloud Pro it is possible to change the appearance and behaviour of the QGIS Cloud Web Client via CSS. You can easily manipulate the colour of frames and fonts, etc. An example that is not obvious is displaying the legend in a fixed location on the map. In this way, the legend can be made a fixed part of the map in QGIS Cloud QWC2.
In the basic configuration of QGIS Cloud QWC2 the legend of a layer is not permanently displayed. You always have to call up the individual legends of the layers via the Map & Tools / Layers & Legend menu. However, in some cases it would be very nice if the legends for individual map layers were always visible in the map. This is possible by changing the basic CSS of the QGIS Cloud QWC2. Customizing the CSS is a feature of QGIS Cloud Pro. If you have a QGIS Cloud Pro account, you can follow these steps 1 : 1.
Create a project for publication on QGIS Cloud
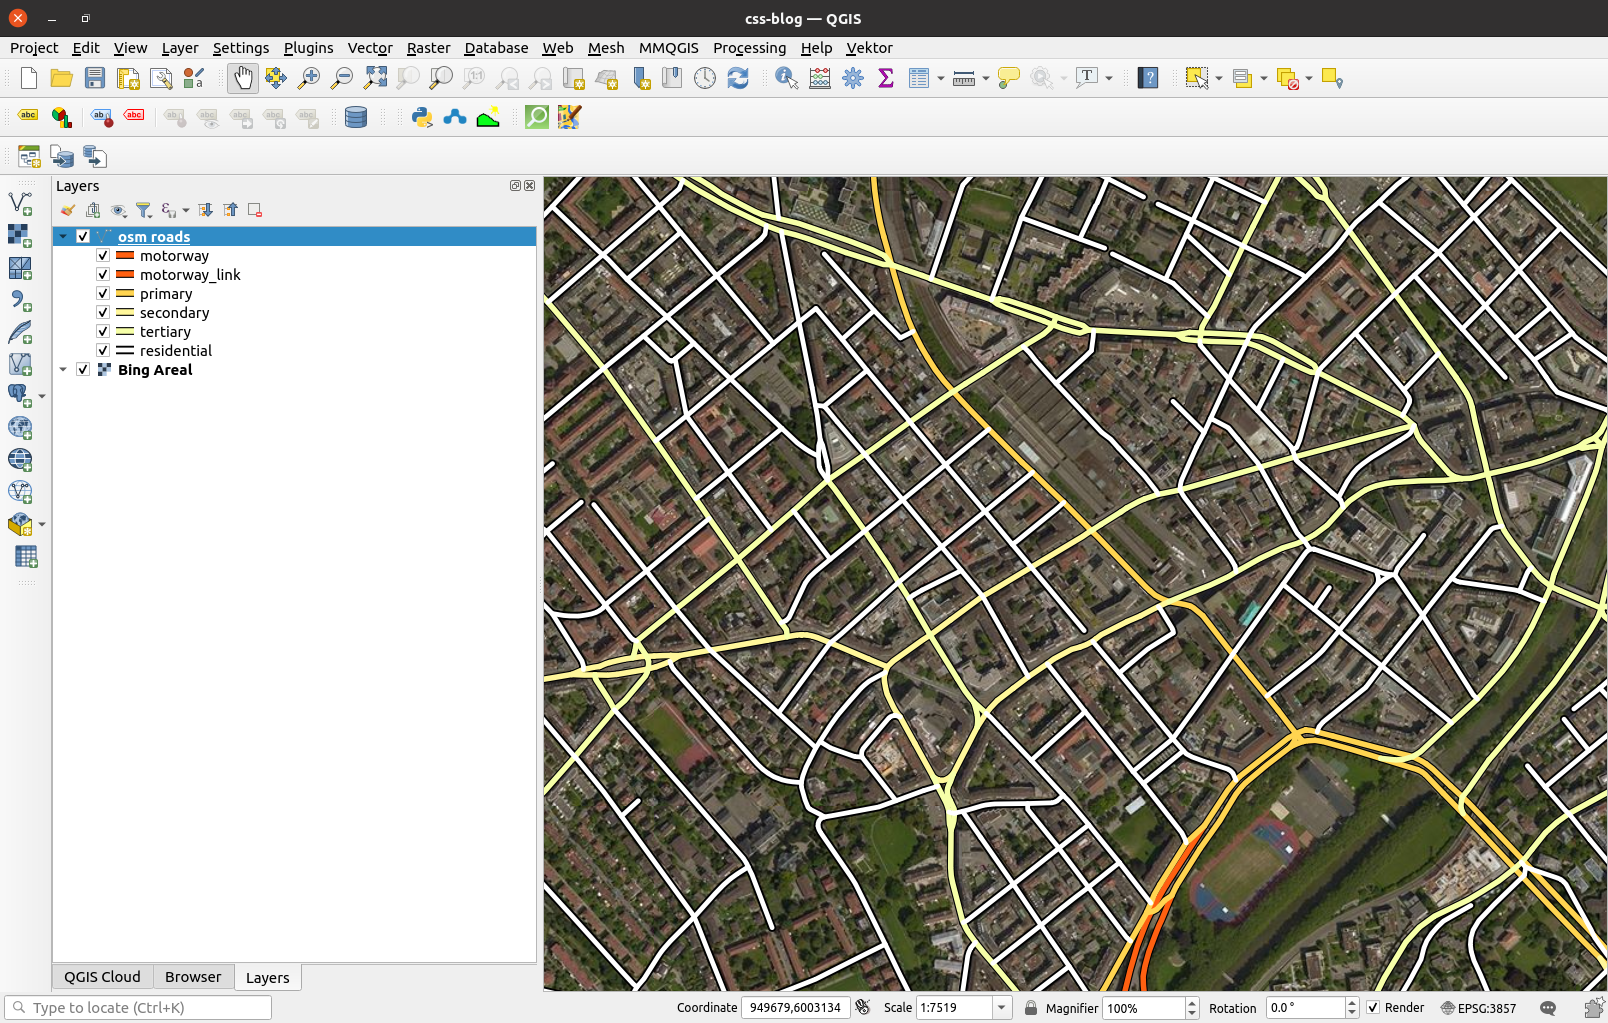
In the first step we have to design a project that contains vector data with one or more legends. In this example, I have chosen a section of OpenStreetMap data of the city of Zurich. The Bing satellite image serves as the background. My project now looks like this.
Upload the project to the QGIS Cloud
Now the project is ready and it can be uploaded to the QGIS Cloud.
- Save the project.
- Open the QGIS Cloud plugin.
- log in to your QGIS Cloud Pro account.
- upload the local data to your QGIS Cloud database.
- publish the project via the QGIS Cloud plugin.
- open the map in QGIS Cloud Web Client.
Creating an individual viewer
To use the possibilities of the individual CSS you need a QGIS Cloud Pro account. Once you have logged in to your QGIS Cloud Pro account at https://qgiscloud.com, the additional menu Viewer is available. You can assign any number of viewers to your maps. In the Viewer you can assign a logo that is displayed in QGIS Cloud QWC2. You can also place a link behind this logo. For our question, you can also change the CSS of the QGIS Cloud QWC2 there.
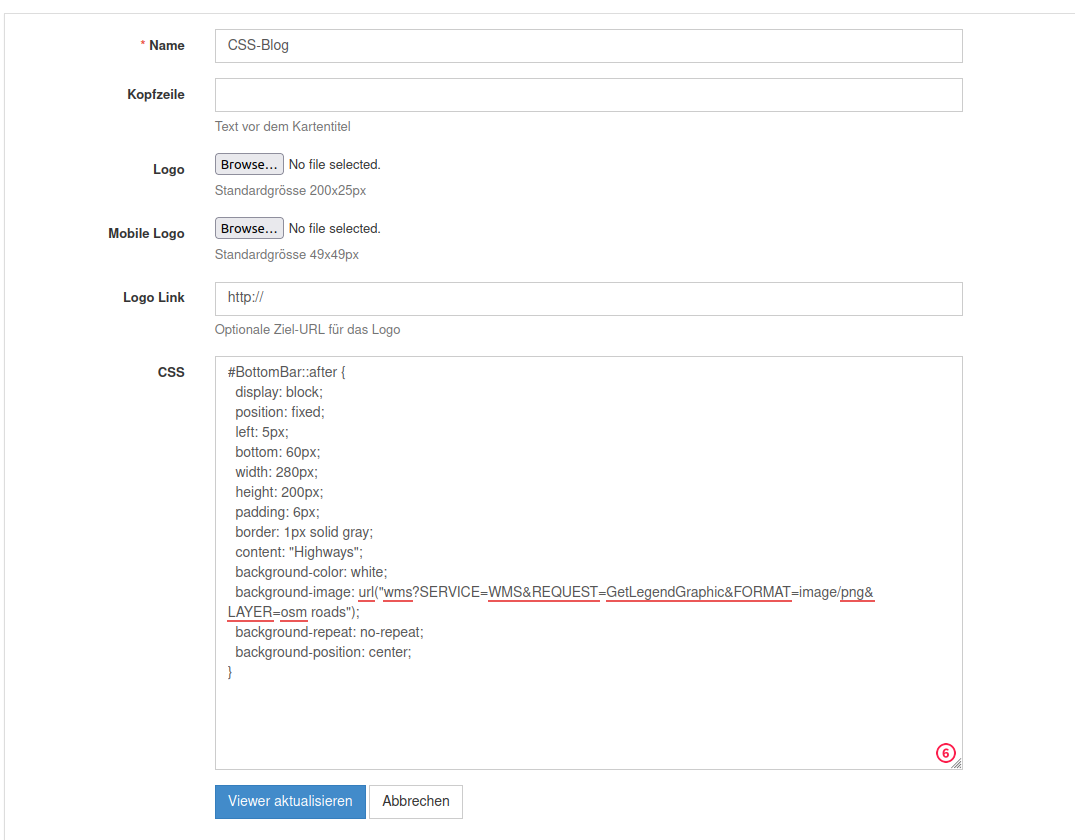
To create a viewer, open the menu Viewer. At least a name must be defined there. Then we are interested in the input field CSS. The additional CSS definitions are inserted there. For our question, implement this CSS code:
#BottomBar::after {
  display: block;
  position: fixed;
  left: 5px;
  bottom: 60px;
  width: 280px;
  height: 200px;
  padding: 6px;
  border: 1px solid gray;
  content: "Highways";
  background-color: white;
  background-image: url("wms?SERVICE=WMS&REQUEST=GetLegendGraphic&FORMAT=image/png&LAYER=osm roads");
  background-repeat: no-repeat;
  background-position: center;
}
When everything is entered, create the new viewer with click on the Create Viewer button. For this example I have named the viewer CSS-Blog.
Assign the viewer to the published project
The next step is to assign the viewer to a map. To do this, open the menu Maps at https://qgiscloud.com. There you will see all the maps published under the current account. Find the map to which you want to assign the viewer you just created and click on the pencil icon to edit the map settings. You can also assign the viewer to the map in the QGIS Cloud Plugin by highlighting the desired project in the Maps tab and clicking the Map Settings button.

When you save the map settings the viewer CSS-Blog is assigned to the map. Now you can open the map in the browser and should see a similar image:
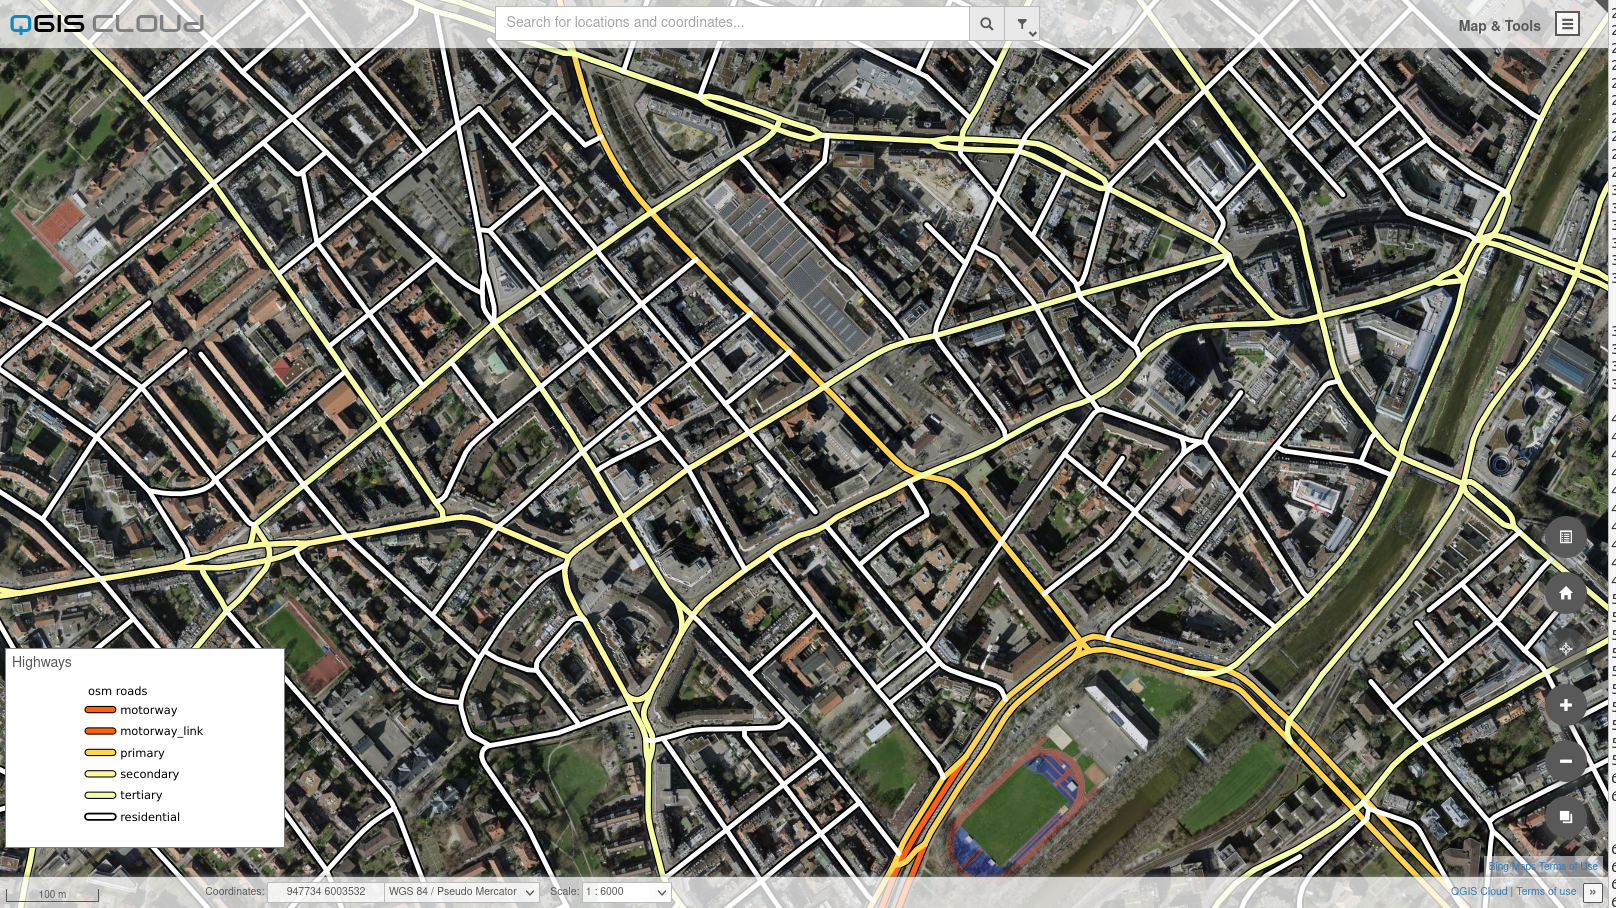
The legend is now always in the same place on the map https://qgiscloud.com/hdus1/css-blog.
CSS Parameter
Finally, I would like to briefly describe the individual setting options in the CSS.
The position of the box on the map is determined with these parameters. Try out different settings.
left: 5px;
bottom: 60px;
width: 280px;
height: 200px;
padding: 6px;
The border of the box can be changed in this way.
border: 1px solid gray;
In the example CSS, the box has the title Highways. You can of course formulate this title as you wish by setting the parameter content accordingly.
content: "Highways";
The background colour of the box can be set like this. In the example it is white, but it does not have to be.
background-color: white;
Finally, it must be defined which legends are to be displayed. The legend is requested as a background image via a WMS request GetLegendGraphic from the current map. Therefore, the LAYER whose legends are to be displayed must be specified in the parameter background-image. The layer names are entered separated by commas. In this case, only one legend is displayed.
background-image: url("wms?SERVICE=WMS&REQUEST=GetLegendGraphic&FORMAT=image/png&LAYER=osm roads");